You have no items in your shopping cart.

21
Jan
I wish I could tell you that after all of my years working with musicians on their guitar rigs that I've never made a mistake. That I've never forgotten a pedal, I've understood every piece of gear I've been using and all of my junction boxes have worked perfectly the first time. It's not the case! I've made some rookie mistakes and I've seen a lot of other people make rookie mistakes as well. It's meant re-working boards, junctions and cables to make sure I can deliver on what I promised.
This blog is the culmination of those common, easy to make pedalboard mistakes. There are so many more that we could add to the list, but this is my top 5. I hope this saves you some time and stress in your future builds!
1. DON'T RUSH YOUR LAYOUT

There is something satisfying about seeing a great pedal board layout. All the pedals come together as if the board was predestined to live in this format. All the jacks line up just right, the power taps fit in just the right slots and the colour of each pedal perfectly compliments its neighbour (this is obviously the most important part of the layout process).
This bliss-filled paradise can be derailed by something as simple as forgetting that you need to fit a tuner on this compact masterpiece.
There's no room!
Where will it go?
At this stage, it's probably easier just to learn perfect pitch or astrophysics than to start your layout from scratch.
**It's worth noting that the above picture was sent to us by Michael Pope before his latest setup. He's got some layout chops - we only had to move a couple pedals in the middle row to suit his signal chain**
How do you avoid this and other common layout mistakes?
Write every pedal, fixture and power supply down on paper
Anything that needs to be velcro'd down or takes up any room should be written down on paper. This will assure that you don't miss anything that takes up space on your layout.
Write out each power tap
Every isolated power supply has a certain amount of outputs. For the Strymon Zuma as an example, you have 9 isolated outputs to work with. Write down each tap, it's voltage options and current output. Something like:
Tap 1: 9v @ 500mA
Tap 2: 9v @ 500mA
Tap 3: 9v @ 500mA
Tap 4: 9v @ 500mA
Tap 5: 9v @ 500mA
Tap 6: 9v @ 500mA
Tap 7: 9v @ 500mA
Tap 8: 9v @ 500mA or 12v @ 375mA or 18v @ 250mA
Tap 9: 9v @ 500mA or 12v @ 375mA or 18v @ 250mA
Match up a pedal or pedals to each power tap
This must be where the buddy system was invented - This step is crucial!
To each of the taps you wrote down on your power supply match up the pedal (or pedals) that best suit that tap.
As an example, you might have a compressor that can run on 9-18v (you can power it with 9v, 12v or 18v). It would make sense to put that compressor on Tap 8 or 9. Write that down.
Match pedals to taps until all of your pedals are paired with a power tap.
Think of your feet!
As far as placement on your layout goes, some pedals are more flexible than others. If you think of a volume pedal, midi controller or wah for example, you will most likely want those on the bottom row. So make sure to place these first!
After this make sure you consider what foot you prefer using each of these pedals with. Do you prefer to tap your midi controller with your right or left foot? What about volume swells? Are those easier with your left or right foot?
This seems like a no brainer - but it's easy to forget!
I/Os - Inputs and Outputs and USB
Do you know where you're going to plug your guitar in and your amp out? Make sure to plan this out in your layout stage. It might be as easy as a side panel jack, but if its not, make sure your first and last pedals can be easily accessed.
In the same way, make sure your USB jacks for updating pedals are also easily accessible. This might look like putting your updatable pedals on risers or on the back row so they can be updated without ripping up your board.
Jacks In!
Do your layout with jacks, midi plugs and power taps in the pedals. It's so easy to underestimate how much a plug takes up.
Like the old saying goes, "When your layout is tight, plug your jacks in, right?"
A warning about digital layout programs.
Yes, you can do all of this on an online pedal board planning app, but just keep in mind that they are not 100% accurate. Use these apps as an outline only! Don't buy pedal boards based on a packed layout from an online app unless you're willing to ditch a pedal when they don't all fit!
If you must use an online app to plan your layout make sure to leave room around all the pedals in case dimensions are a bit off and/or jacks and power taps don't line up quite as expected.
2. FUTURE PROOF YOUR PEDAL BOARD

If I had a dollar, nickel or dime (if this was 10 years ago - a penny) for every time I heard a guitar player say, "I'm not going to change this pedal board for years to come." I'd be moderately comfortable - financially speaking.
Guitar players love gear. I understand the desire to want to stick with a pedal board for the long haul, but we also have to address the fact that companies keep coming out with awesome pedals that are difficult to refuse...
KIDDING
I know I'm the only one with GAS - Gear Acquisition Syndrome.
There are two common options here.
1. Shut yourself off from the music industry - so as not to be tempted by the latest pedal offerings.
2. Resigning yourself to never finishing your board so you can stay forever flexible to the changing gear scene.
The third option is by far my favourite.
3. Plan out your pedal board with changes in mind!
How?
Leave space around the most commonly changed pedals.
This means your overdrive that you're not fully in love with, your last dry effect, your first wet effect and possibly one or two others suited to your tastes. Leave an extra inch (2.54cm) around all sides of that pedal if it's possible you'll change it out for something bigger.
Loop your cables.
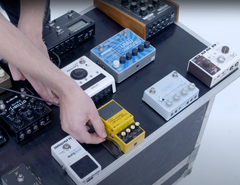

As shown in the picture, when running your cables, go past the jack you want to connect and loop back. This means if you ever go from side mount to top mount jacks, you will have the slack on your cables to do so! The best part, it can still look really clean and purposeful! People won't even know you're future proofing! Do this for signal, midi and power.
Make sure you have an extra power tap or two.
You may not have room for an extra pedal on your board, but it doesn't mean your future pedal won't need a voltage or current doubler (requires two power taps instead of one). You'll feel like an absolute LEGEND when you don't have to re-jig all of your power when that extra thirsty delay pedal gets released.
The only other points I will leave you with is to make sure your power supply can easily be plugged in anywhere in the world.
If you're running a power supply that requires a physical switch to change from 240v down to 120v MAKE SURE YOU BRING SPARE FUSES!!!! If you have something like a Strymon power supply - just pat yourself on the back, you can plug that baby in anywhere and it will do all the switching for you internally and automatically.
Can you easily bypass your volume pedal mid-gig?
These things rarely happen when convenient! If your volume pedal string breaks, or gear decides to throw a tantrum and seize up mid set, how are you going to bypass it? This may sound like overkill - until it happens!
*Volumes always seem to break heal down as well (in the off position) - Why?*
If you use Audition - you can just push a button to bypass your volume pedal.
If you leave some slack on your volumes input cable, you might be able to reach the next pedal in your signal chain and bypass it all-together.
What happens if an amp dies?
If you're using one amp and your amp dies - you need a new amp. If you're running a 2 amp setup though you might want to consider a way to re-route signal to your one remaining amp. If you're running stereo this might mean an easy way to go from stereo to mono without re-patching your board. If you're running a wet dry rig, this might be a line mixer that you can turn on to send your wet and dry signals to your one remaining amp.
Check out Interfacer, Underfacer and Output if you want to learn more about the above.
Again, unless you're touring with a full time tech, you need to be able to fix this stuff quickly and easily. Hitting a button to send all signal to your one working amp can save you a lot of time in a gig!
3. DON'T CATCH OPTION PARALYSIS

It's easy to assume that as a business owner in the music industry, it's in my best interest for every guitar player to have a MASSIVE pedalboard.
You would be 100% correct in thinking that - it would be in my best interest. But not in yours!
My goal is for players to have the best rig for their needs. Nothing more, nothing less.
Don't get sucked in to the idea that you need all these sounds and pedals up your sleeve for situations that are never going to come to pass.
If you are building your first pedal board and learning about effects, buy a few pedals that are easy to grasp and use, don't buy 4 delays, 3 chorus pedals and stack them all with your 9 overdrives.
A really good exercise for this - Think about the last 6 months of your playing, practicing and songwriting habits.
1. What sounds did you use?
2. What sounds could you not get when you needed them (this will be fewer than you think)
3. Is your current need for sounds going to change in the next 6 months?
Chances are, you won't actually need that many changes in the months to come and packing all those unnecessary effects on your board will really just be for conversation starters rather than practical use.
Less is more until you really need more.
The other thing you need to consider - The more pedals you have, the harder it is to play guitar, the easier it is to play [with] pedals.
If your goal is layering a ton of effects, you're going to need a lot of effects to layer (that felt like a wise thing to say). For most of us though, our goals are closer to, 'Making great music' and you have a number of specific effects that come to mind when you think about 'your sound'.
The more pedals you have, the harder it is to simply play guitar.
Instead of adding a ton of unused, neglected effects, put some effort into preparing your board for different venue types and routing options. You'll be glad that you have the option of running Wet Dry, or Stereo when the venue allows and even more glad that you can run mono if that right amp in your stereo pair decides to catch fire in the middle of "Gettin' Jiggy With It".
To sum up. I LOVE pedals. But even more than that, I love seeing pedals being used well. Put pedals on your board that you'll use, leave the ones off that you won't.
4. UNDERSTAND YOUR SIGNAL CHAIN

You may be thinking, 'This point is fourth on Grants list, it must be 4th most important' or, 'Grant only really had two points, but that's not enough, so these next points are just filler'.
Firstly. How dare you. Just... Stop.
Secondly. This is my favourite point out of the 5 and would be my top takeaway from this blog. So much so that I did a four part video series on this topic alone!
If you've put your board together yourself or hired someone else to do it for you, you still need to know your signal chain!
Why?
If something happens in the middle of a gig (again, things always go wrong at the worst possible times) you need to know how to get a sound out of your rig with the most amount of gear - FAST.
If you have no idea what pedal plugs in where and what power taps feed which pedals you are destined to plug your guitar into your amp for the rest of the gig.
If you know your last overdrive and your first modulation effect, you can bypass half your board in under 3 seconds and see if you get sound back (Either plug guitar IN to your first wet effect or your amp OUT of your last overdrive).
Imagine instead of plugging guitar into amp you could have all of your dry effects or all of your wet effects in the same amount of time? Thats a pretty good compromise if you ask me. This gives you time to find any obvious problems during the next drum solo (knowing drummers, you could rewire your whole board and knit yourself a sweater by the time that solo is done).
Marcus Catanzaro (The guitar tech for Neil Finn / Fleetwood Mac) has some great points on this. Check out our interview!
5. DON'T GO CHEAP ON THE ESSENTIALS

I understand that there is a certain appeal to shiny new pedals. Having the latest and greatest is par for the course in the music industry and I'm no exception. I love NGD (new gear day) - I mean, I started a pedal company partly so I could write pedals off as a business expense.
But I have to be that guy and tell you that if buying a new pedal comes at the cost of your pedalboard essentials, you need to revisit your priorities.
If you are buying new pedals at the expense of reliable cables and good power, just take a minute and think about that decision.
1. A patch cable carries every note you will ever play, unlike that new delay which is only used when its 'on'. Buying a cheap patch cable will always affect your tone. Buying a dozen cheap patch cables will completely change it - if they work long enough to make it to the gig.
*Check out this interview with Tony Farinella of Evidence Audio to learn the importance of your cable choice!*
2. Power Supplies are also used for every note you play. If you want a rig that doesn't have added power related noise, make sure you get a decent power supply. Voodoo labs, Cioks and Strymon (among others) are all companies that make great supplies.
3. Guitar and Amp - Yes, these are also always used and make a huge difference to your sound. I won't go into this as its a can of worms I'm not willing to open right now. Get a guitar and amp that inspire you to play more rather than less and you're doing well.
There is no possible way we can fit all the 'must knows' for your rig in a single blog, but I hope this gets you thinking and ultimately approaching your pedal board in new way.
If you have questions or comments, I'd love to hear from you - info@goodwoodaudio.com.
